March 16, 2025, 05:49:15 PM

Author Topic: My 4.3 vortec 84 FB  (Read 127835 times)

Offline rk970

My 4.3 vortec 84 FB
« on: September 21, 2010, 03:05:31 PM »
Just getting started on the build.. will post more pics as it progresses

Yes I know its not a V8 but a rather large V6 that is not near stock. (89 block, 525 lift cam 110 L/C 4 deg advanced, 97 Vortec heads, modified intake for port injection running MSIIextra)
V8 camaro T5 trans.. 


4.3 Block by rk970, on Flickr


4.3 Cylinder Head by rk970, on Flickr


4.3 Rx7 by rk970, on Flickr
« Last Edit: August 17, 2018, 07:01:09 PM by rk970 »

Offline spacevomit

Re: my 84 FB
« Reply #1 on: September 21, 2010, 03:12:27 PM »
What engine is that? I'm looking forward to this.

Offline rk970

Re: my 84 FB
« Reply #2 on: September 21, 2010, 03:35:34 PM »
the block is a GM 4.3l 90degree V6 Casting date 1989.  A non balanced shaft, roller cam, one piece seal block.  The heads are from a 1997 astrovan/s10/blazer that have been.. umm modified...  I will post pics of the intake when I get it done... 
A L31 V8 with the same specs (after all the v6 is essentially the v8 with 2 cylinder hacked out) would make around 436~446 Hp at the crank. So in theory I should see around 330 hp at the crank if I can make a set of header that do not have to many compromises..
I built it for a very strong mid range punch, I can't see it making power after 6300 rpm. 
« Last Edit: November 19, 2012, 01:40:28 AM by rk970 »

GordiniRX7

  • Guest
Re: my 84 FB
« Reply #3 on: September 21, 2010, 04:27:51 PM »
Im looking forward to this aswell. We need some more FB builds.

Offline rk970

Re: my 84 FB
« Reply #4 on: September 24, 2010, 12:00:01 PM »
Hey look,,, it is going to actually fit..


I took the front cross member out, this is just a test fitting...   
I know that grannys flips the cross member around, which I think is a bad Idea (It moves the lower control arm mounting point about 1")
Instead of flipping the cross member I am cutting off the engine mount points off and flipping them
I will post more pics so you all can see what I am talking about..

I almost forgot to add.  Since the cross member bends in the center toward the front of the car and that the v6 is about 5" shorter then the V8 I have to cut a small notch in the cross member.  Actually the pan clears it by like 1/16" so the notch is going to be about 3/4" x 3/4" by 7" wide.
« Last Edit: April 23, 2013, 03:08:08 PM by rk970 »

Offline Dr1ft1ng0wns

Re: my 84 FB
« Reply #5 on: September 25, 2010, 07:13:54 PM »
looks awesome! looking forward to seeing it finished.
87 se, roller cam 350, t56, 8.8 IRS
http://www.norotors.com/index.php?topic=41
89  Honda civic SI/Gs-r (B Series)
83 K5 Blazer on 37's
01 Civic DD
89 Chevy Crew cummins 24v powered on 37's

Stan G

  • Guest
Re: my 84 FB
« Reply #6 on: September 25, 2010, 07:51:25 PM »
Good luck with the build.

Due to fitment issues between headers and the steering box, you should consider offsetting the engine towards the right side an inch or more .

It will also help with weight distribution since the drivers side tends to  weigh close to 200 lbs more than the passenger side .

Offline rk970

Re: my 84 FB
« Reply #7 on: September 26, 2010, 03:55:02 AM »
I already have the headers, no clearance problems with  the engine centered. I am moving the battery behind the passenger seat anyways..

http://www.sandersonheaders.com/Sanderson-CV97-Full-Length-Header-Set-for-Chevy-V6-Engines.html

The driver side header fits with plenty of clearance .  The passenger side needed the #2 cylinder tube moved/modified. I will post pics when I get them back from coating.. 

Fitting 3 tubes per side is a bit less daunting  then 4...

The stock rotary is mounted to the left (to give room for the exhaust)
rk 
 
Update Oct 1st
Well Stan G your are right... I am moving the motor to the right about 3/4"~7/8" The hand brake also makes it a little close to the tail shaft of the trans with it centered...   
« Last Edit: October 01, 2010, 11:58:42 AM by rk970 »

Offline rk970

Re: my 84 FB
« Reply #8 on: October 04, 2010, 01:58:34 PM »
I will post more pics later this week,  I got a few parts in from speedway motors.
3/4" clutch master cylinder
7/8" CNC pull slave (with an extra 5/16" heim joint)
19"x22" radiator ($109 could not believe the price)
Clutch fork, adjustable pivot

So I removed the stock clutch master cylinder and measured the stroke @ 22~23mm approx 15/16~7/8.
so...  (.750/ 2) squared * 3.14 * .875 " = .441Cuin   of fluid displace at the clutch master cylinder.

The slave has .601 sqin and will pull  .441/.601  = .734 in

The 10.5" diaphram clutch has approx a 6:1 ratio and needs to move the plate .100 to .115" plus about .040~.060" for clearance   or .640 to .750" at the throw out bearing
Soooooo..   1.15:1  to a   0.98:1 ratio on the clutch fork... I think a 1:1 will put it were I need it..   
Like I said I will post pics of the slave mounting when I get to it
rk

Offline bikedad

Re: my 84 FB
« Reply #9 on: October 04, 2010, 02:52:11 PM »
Looks great!
Looking forward to how this performs when running.

BTW, your engine looks like the little cousin to mine.  :D    Same color scheme.

[smg id=432]
Don Teifke  :drive:
[smg id=8489]
"Life is tough.,, Life is even tougher if you're stupid."
-----John Wayne-----

Offline rk970

Re: my 84 FB
« Reply #10 on: October 04, 2010, 06:17:50 PM »
Looks great!
Looking forward to how this performs when running.

BTW, your engine looks like the little cousin to mine.  :D    Same color scheme.

[smg id=432]


Yes it does, minus 2 cylinders and 500lbs  :D

Offline rk970

Re: my 84 FB
« Reply #11 on: October 04, 2010, 06:26:46 PM »
Well I will be damed   .
http://www.norotors.com/index.php?topic=626.msg6662.html#msg6662
Funny what a search will bring up   ::) 
Interesting, I really do not think a 5/8 clutch master will give enough clearance between the plate and disc with the clutch dis-engaged, and the clutch will engage when the pedal is just barely coming off the floor

Offline Defenistrator

Re: my 84 FB
« Reply #12 on: October 05, 2010, 01:08:37 AM »
That's very cool, in the early stages of planning my FC build I was considering a 4.3 as well, probably megasquirted, but with cam and compression just mild enough for a possible turbo upgrade.  I've driven my mom's 2000 Astro plenty of times and it actually does fairly well empty, actually got a random opportunity to hand a ricer honda boy's ass to him hard in that thing.   8)  I know Pez built a decent 4.3 swap too, though I think most of that info was lost with the v8 rx7 forum...  :(
1990 GXL, L33 swap and 8.8 independent rear in progress.
Ongoing build thread: http://www.norotors.com/index.php?topic=2916.0

Offline rk970

Re: my 84 FB
« Reply #13 on: October 23, 2010, 06:05:27 AM »
Well just so nobody thinks I have been slacking...


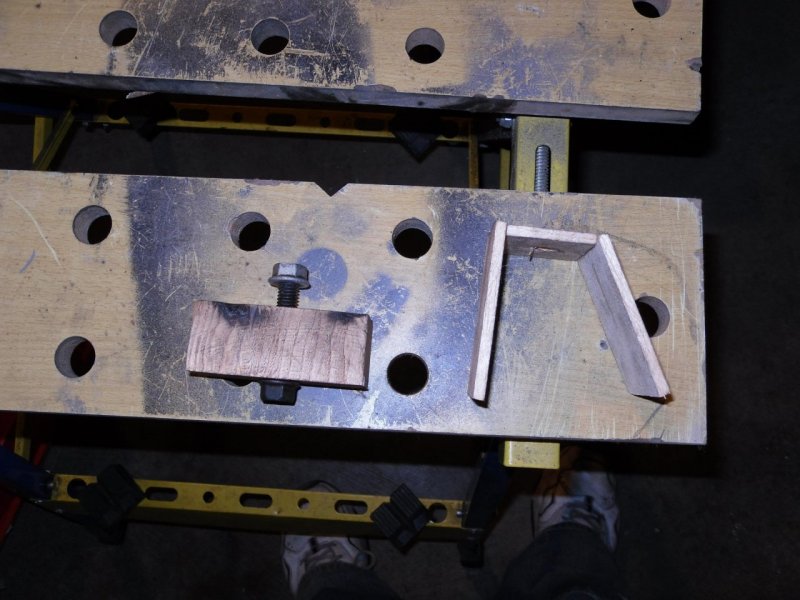
I cut a piece of wood about 1/8" shorter then the motor mount (to account for the squish/sage of the rubber) with a through hole and bolt for mocking up the mounts..


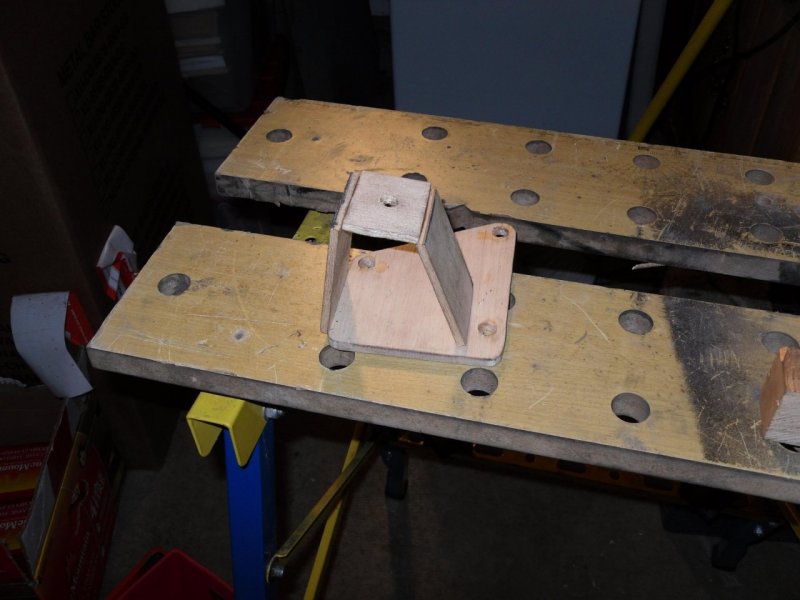
Mock up of the motor mount in balsa wood (hey I build r/c planes from scratch/plans)

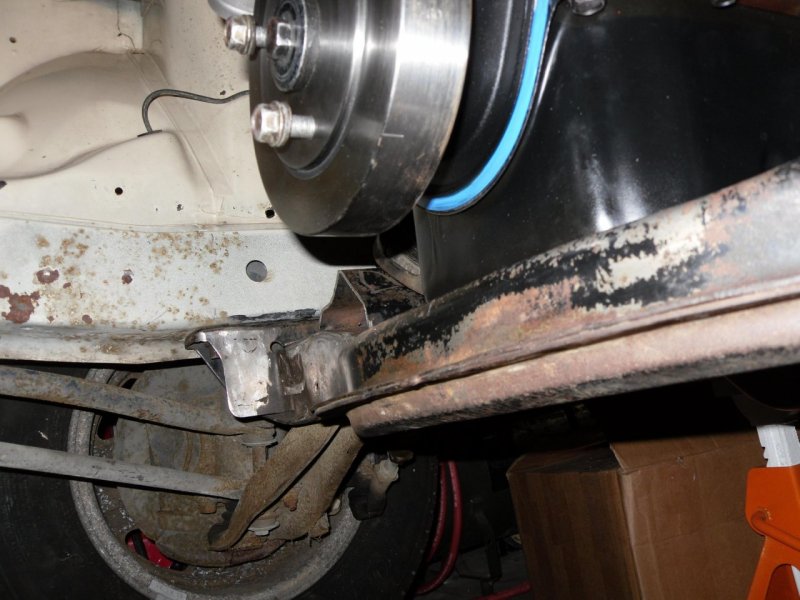
Instead of flipping the crossmember around I cut off the mounts and swapped them from right to left. This places the mount pads towards the rear, keeps the suspension pick up point in the stock location (if you flip the crossmember it moves the suspension mount point 1.25").  The crossmember mounts are tacked in and will be welded and plated (I will post pics) this weekend.


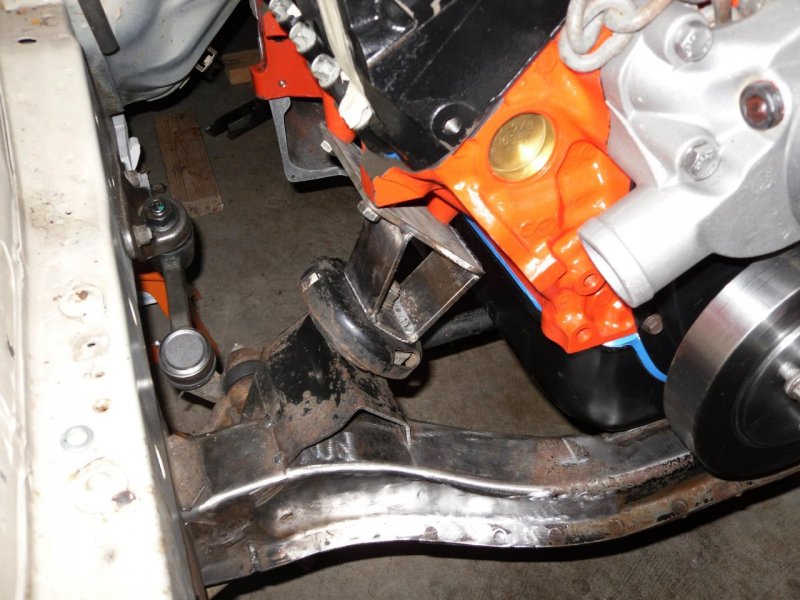
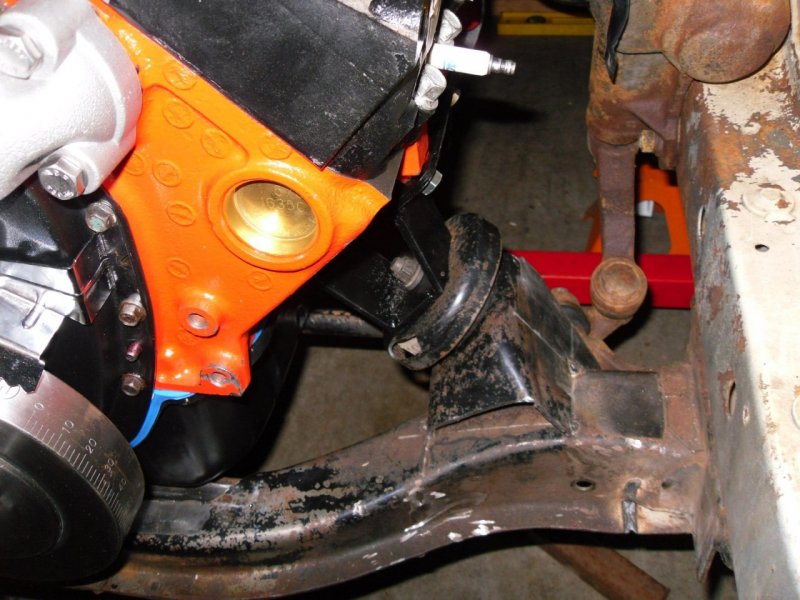
Right side motor mount


Another Right side


Right side again


Left side motor mount


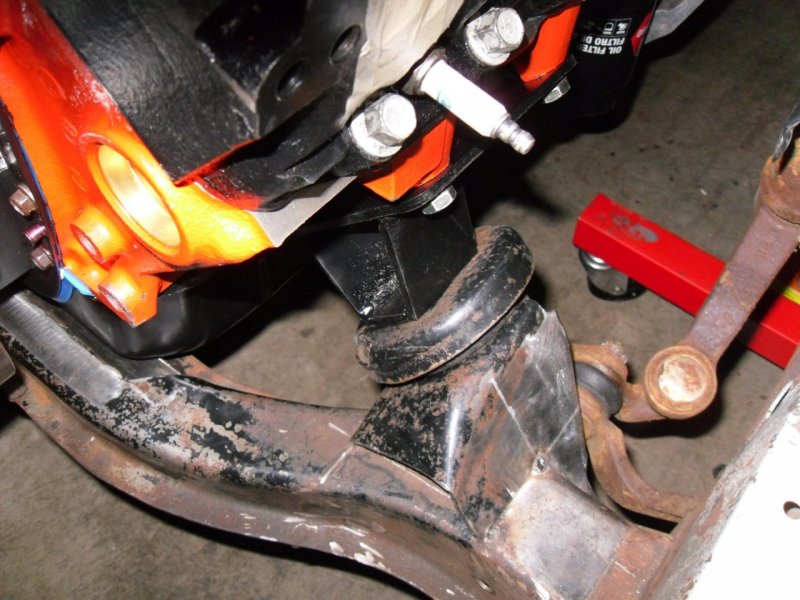
Another left motor mount


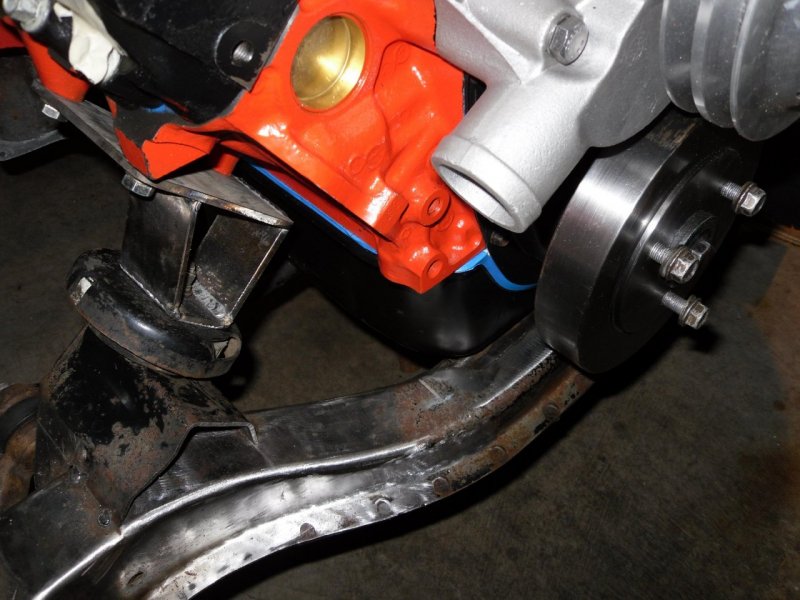
3/4" x 3/4" notch in the cross member to clear the front of the oil pan.


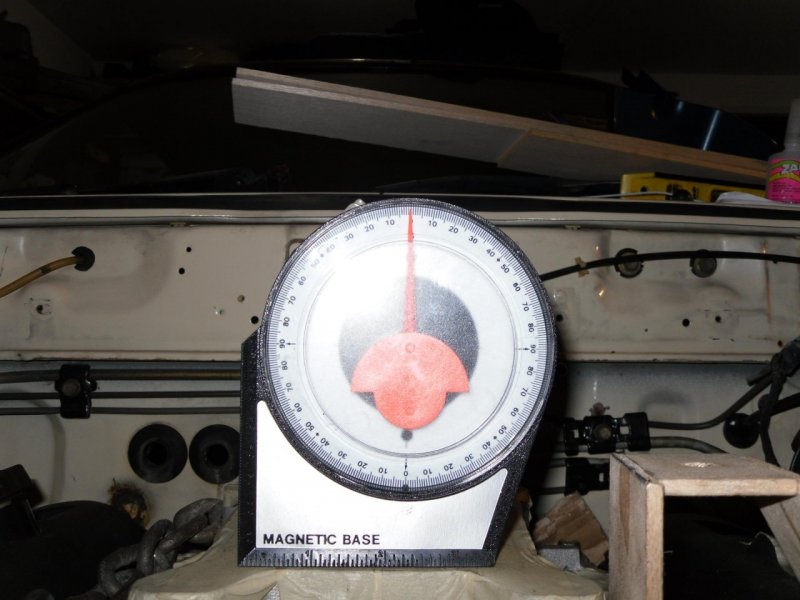
Side to side looking level.


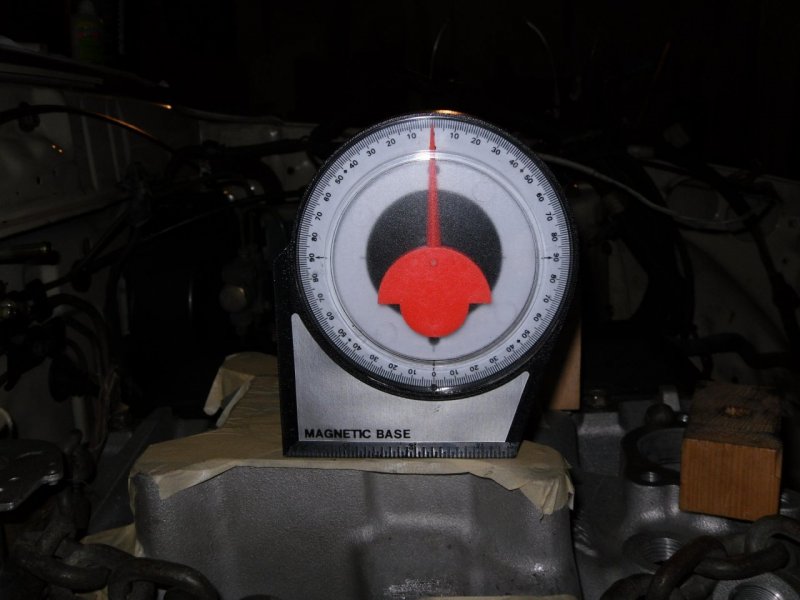
Front to back looking level..


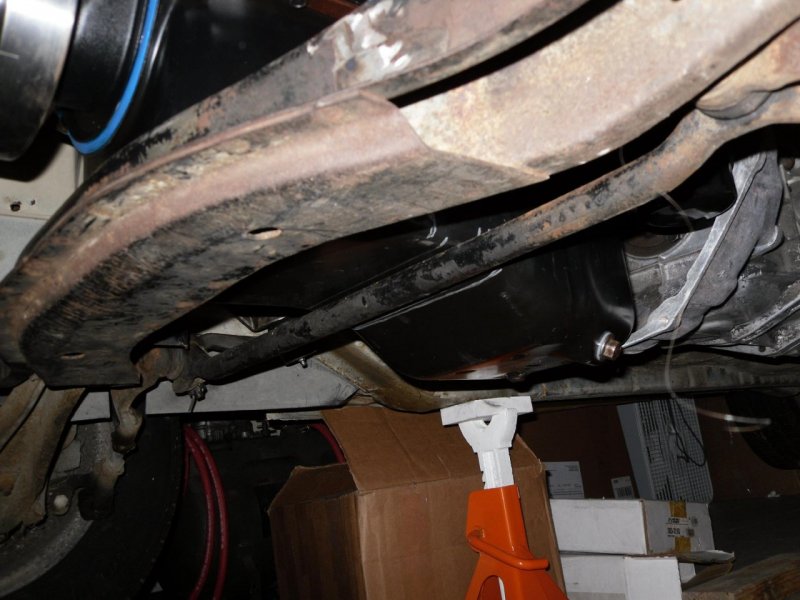
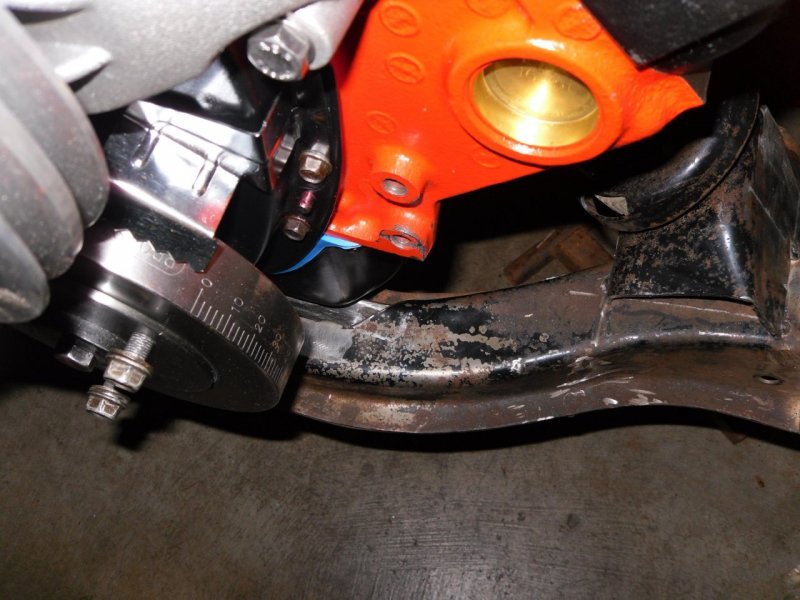
Drag link.  The next operation is to notch the pan.  There is 1/64" clearance between the pan and link right now.


Front of the oil pan and balancer (7")


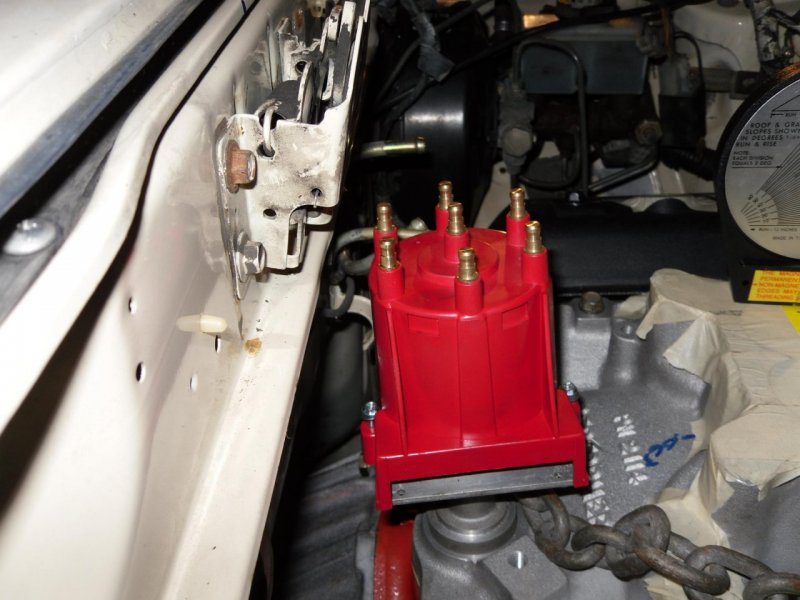
Final placement of distributer cap.
« Last Edit: October 03, 2013, 12:57:19 PM by rk970 »

Offline rk970

Re: my 84 FB
« Reply #14 on: October 25, 2010, 11:48:20 AM »
A few more pics of the cross member and oil pan


Right side


Left side


Notch for the front of the oil pan


Notch for drag link, pad is for drain plug (not drilled or tapped yet)


« Last Edit: October 03, 2013, 01:02:30 PM by rk970 »