March 17, 2025, 09:04:24 PM

Author Topic: Laminar's RX-8 EcoBoost swap thread  (Read 43072 times)

Offline digitalsolo

Re: Laminar's RX-8 EcoBoost swap thread
« Reply #180 on: May 20, 2024, 09:39:39 AM »
Nice work on the DI delete.  What's the bolt for behind the end of the cam?
Blake MF'ing McBride
1988 Mazda RX7 - Turbo LS1/T56/ProEFI/8.8/Not Slow...   sold.
1965 Mustang Coupe - TT Coyote, TR6060, modern brakes/suspension...
2007 Aston Martin V8 Vantage - Gen V LT4/TR6060, upper/lower pullies, headers, tune.
2021 Tesla Model 3 Performance - Stock...ish.

Offline Laminar

Re: Laminar's RX-8 EcoBoost swap thread
« Reply #181 on: May 20, 2024, 09:47:21 AM »
Day 2: After finishing up the DI blockoff and getting that installed, I turned to the shifter bracket. I had it tacked in roughly the correct location but I still needed to make a bracket that actually gave it strength.

Here's what I ended up with tacked up:


Again, I'll have to confirm clearance and fitment once it's in the car, but I'll probably add another brace to stiffen it up even more.

I wanted to run the engine on E85 on the stand to at least confirm startup and idle on the corn juice before trying to run it in the car.


The flex sensor measured it at E66 (pump said E70). The Link's multi-fuel setup worked well and startup, idle, and warmup worked great. Once the engine was almost up to temp, one of my coolant hoses let go and tried to spray hot coolant everywhere.


Had to take some time to clean that up, but I felt good about running on Ethanol. After that I purged the fuel system a few times to get it back down to E0 and ran the engine for a few minutes to make sure there was no ethanol remaining in the lines.

Last task for the day was biting the bullet and making some cowl cuts. I had marked out where I'd need to clearance for the coolant hose and vacuum pump, so I went ahead and made those cuts.


[img]

Offline Laminar

Re: Laminar's RX-8 EcoBoost swap thread
« Reply #182 on: May 20, 2024, 09:50:19 AM »
Nice work on the DI delete.  What's the bolt for behind the end of the cam?

I needed to pilot the center point for the cam cave and I absent-mindedly went straight through the full thickness. I made an attempt to weld it shut but some combination of my welder settings and rod condition completely prevented any kind of reasonable weld (you can probably still see some of the splatter). So I just tapped the hole and plugged it with a bolt/locktite.

Offline Laminar

Re: Laminar's RX-8 EcoBoost swap thread
« Reply #183 on: May 20, 2024, 10:10:41 AM »
Day 3: Let's get the engine back in the car. Tearing the engine down on the stand took some time, but it wasn't too bad. I received my clutch slave spacer a while ago so with the trans off of the engine I went ahead and installed that. Measurements showed about 1/8" of extra travel with the spacer installed which is perfect.

Then I did a final torque on the flywheel and clutch assembly since I'd only ever zipped them into place with the impact for testing. I also fit the trans back up to the engine to confirm everything went together nicely and I wouldn't have to fight getting the trans installed from under the car too much.


Going down...


Coolant hose is still tight and will require more clearance.


Almost in...


Turns out I need a little more of a notch around the vacuum pump.


I pulled the engine forward and notched a little more but couldn't quite get that second engine bolt in place. That will have to happen tomorrow.
« Last Edit: May 20, 2024, 11:23:52 AM by Laminar »

Offline Laminar

Re: Laminar's RX-8 EcoBoost swap thread
« Reply #184 on: May 20, 2024, 10:31:17 AM »
Day 4: I started out by pulling the engine forward again and finishing out my notches. With that clearance made, the vacuum pump nestled nicely in place. You can't quite tell from this angle, but the wiper arm is definitely going to wipe out the vacuum pump, so I will need to modify that to raise it up a tad so I don't get interference there.


Engine in place:


Put my AC bracket in place, but found it slightly interferes on the frame lip. I should be able to clearance that lip without issue:


Next up was getting the trans in place. Wrestling the 127lb transmission up onto the transmission jack while under the car was a bit of a feat. From there I lifted it up, but found that there was no way I could go up high enough to engage the input shaft without hitting the shifter on the tunnel, so I had to pull the shifter. Then I found that my shifter bracket was fouling on the tunnel, so I had to pull and clearance that a couple of times, but I finally took off enough that it fit.


The shifter won't actually sit this high, I just need to modify the shift lever so that the stock knob will screw onto it then I'll be good.


Threw in the driveshaft and confirmed clearance to the shift linkage:


Then I went ahead and got the turbos and their associated fuel and coolant lines fitted. I clocked the compressors to where I want the outlets:


I only had an issue with one coolant line, it's currently kind of a Z shape and will just need straightened out and it should be good:


All of this took about 6 hours, most of it spent lifting/holding heavy stuff above my head while laying on the floor, so I was pretty wiped. I decided to do one more thing and worked on modifying the upper coolant hard pipe that was fouling on the hood pretty badly.


I cut it right before the angle and rotated the outlet down so that it exits between the throttle body and valve cover. I'll probably have to reposition the vent hose as I figure that's suppose to be the highest point in the cooling system to get air bubbles up to the reservoir. Now the hood only hits the throttle body.


I also cut off and plugged the outlet for the trans cooler that no longer exists:

« Last Edit: May 20, 2024, 11:16:01 AM by Laminar »

Offline Laminar

Re: Laminar's RX-8 EcoBoost swap thread
« Reply #185 on: May 20, 2024, 11:06:34 AM »
Day 5: I had some kids' school stuff to attend and the wife was interested in doing happy hour together, so my time was limited. I also wanted to make a trip to the hazardous waste place to drop off old oil, coolant, and filters. With that in mind, I figured it was a good idea to swap out the old oil filter that came with the engine from the junkyard.


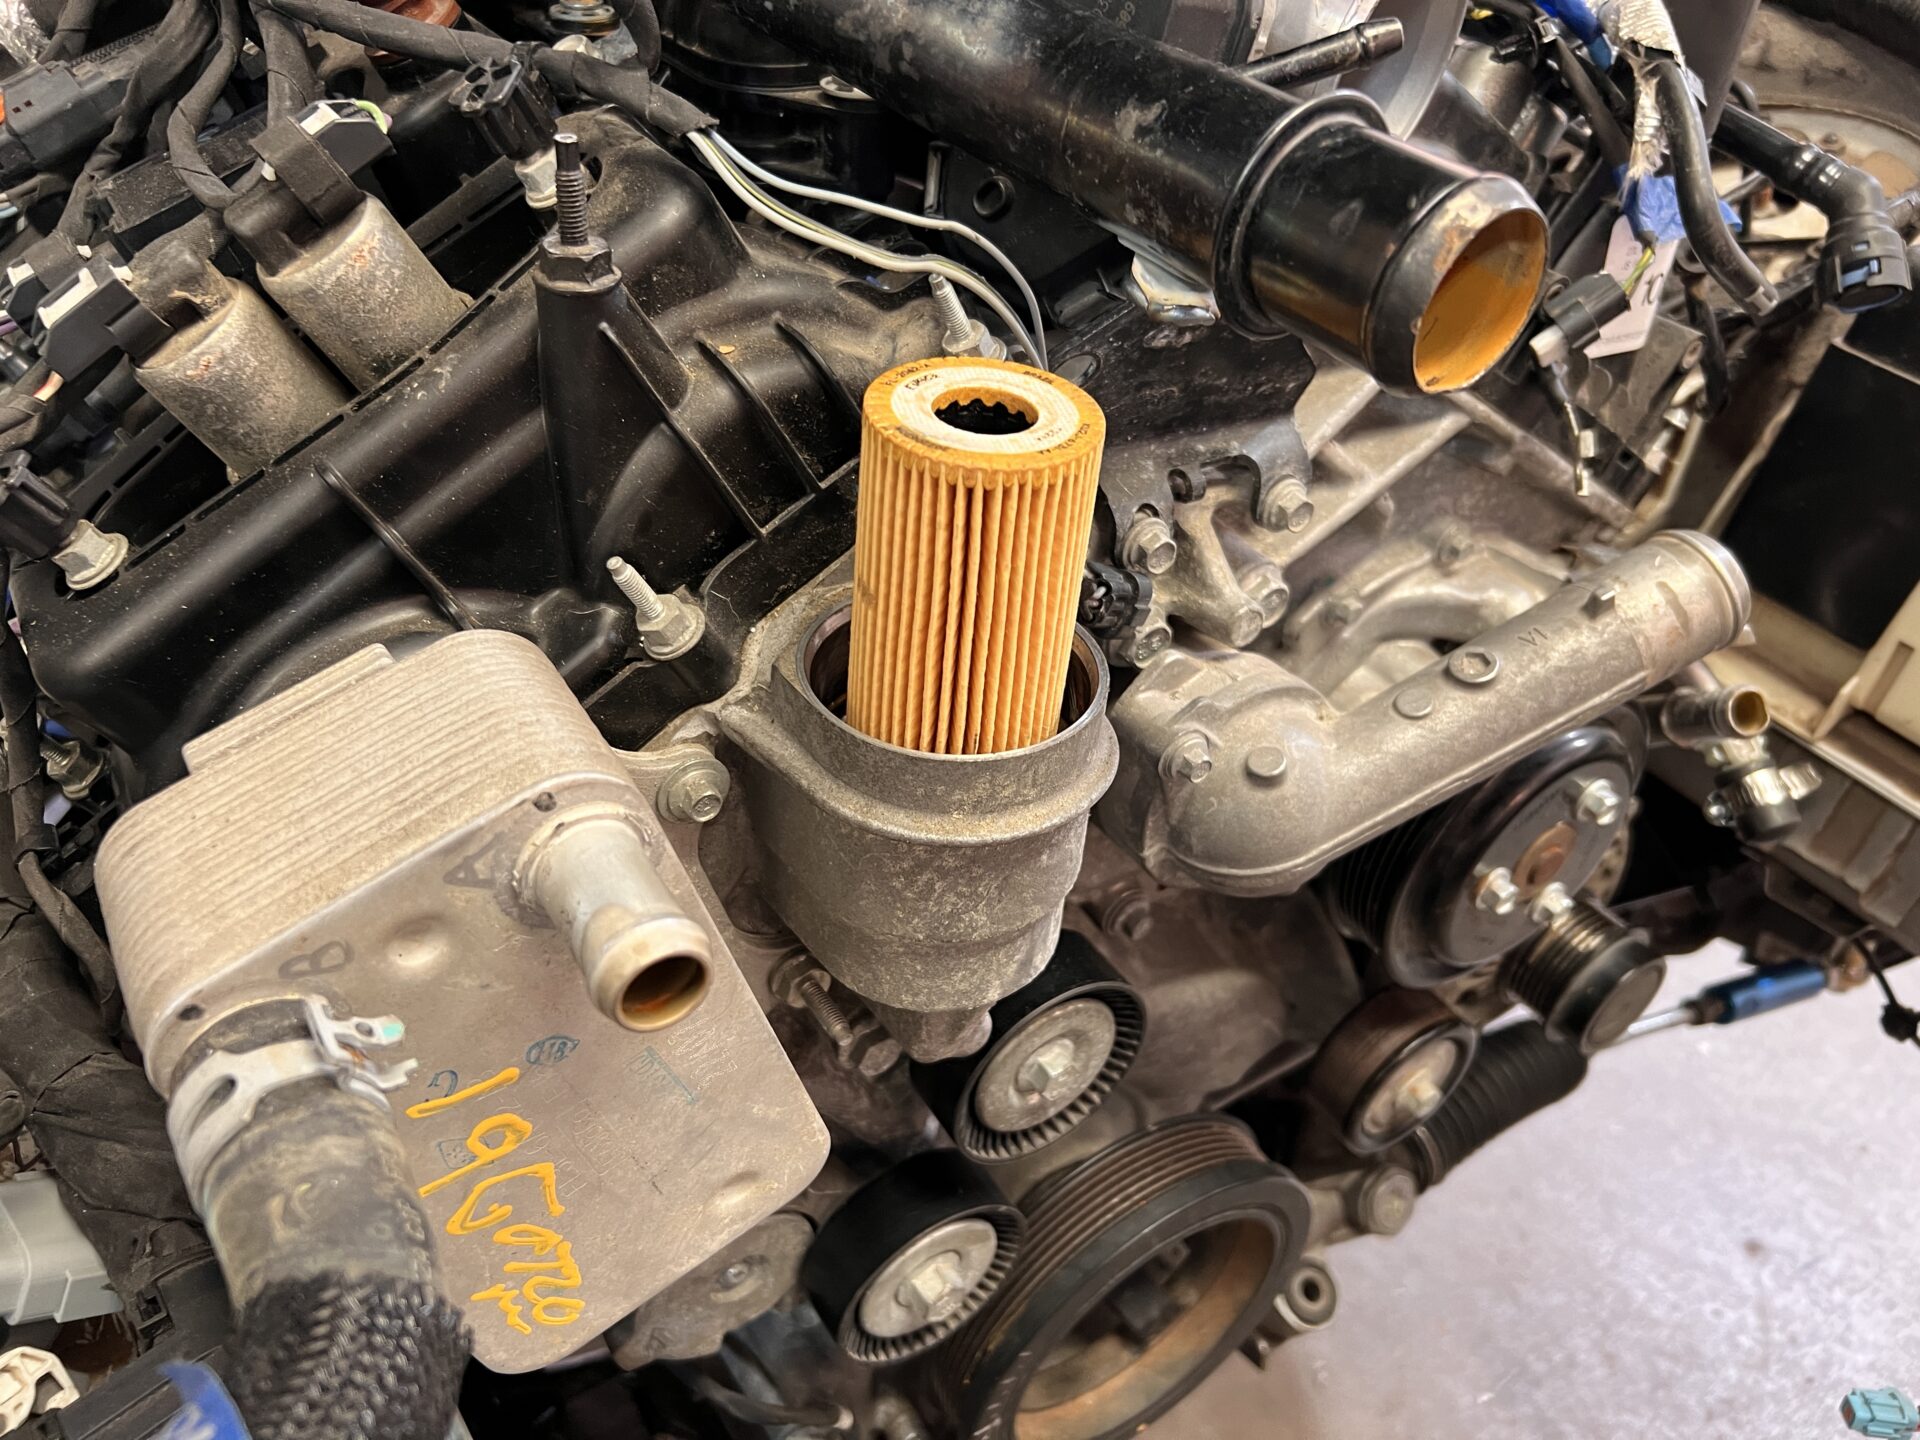
Interestingly, the guy at the waste disposal place said these paper cartridges can be placed straight into the trash where the metal canisters have to be disposed of properly. Weird that I can dump an oil-soaked filter right in the garbage but I'm not going to argue with that.

Then I spent some tire staring at the steering rack. In its current location it's about 1.5" lower than stock. I have a bump steer kit installed but I'm worried about stability.


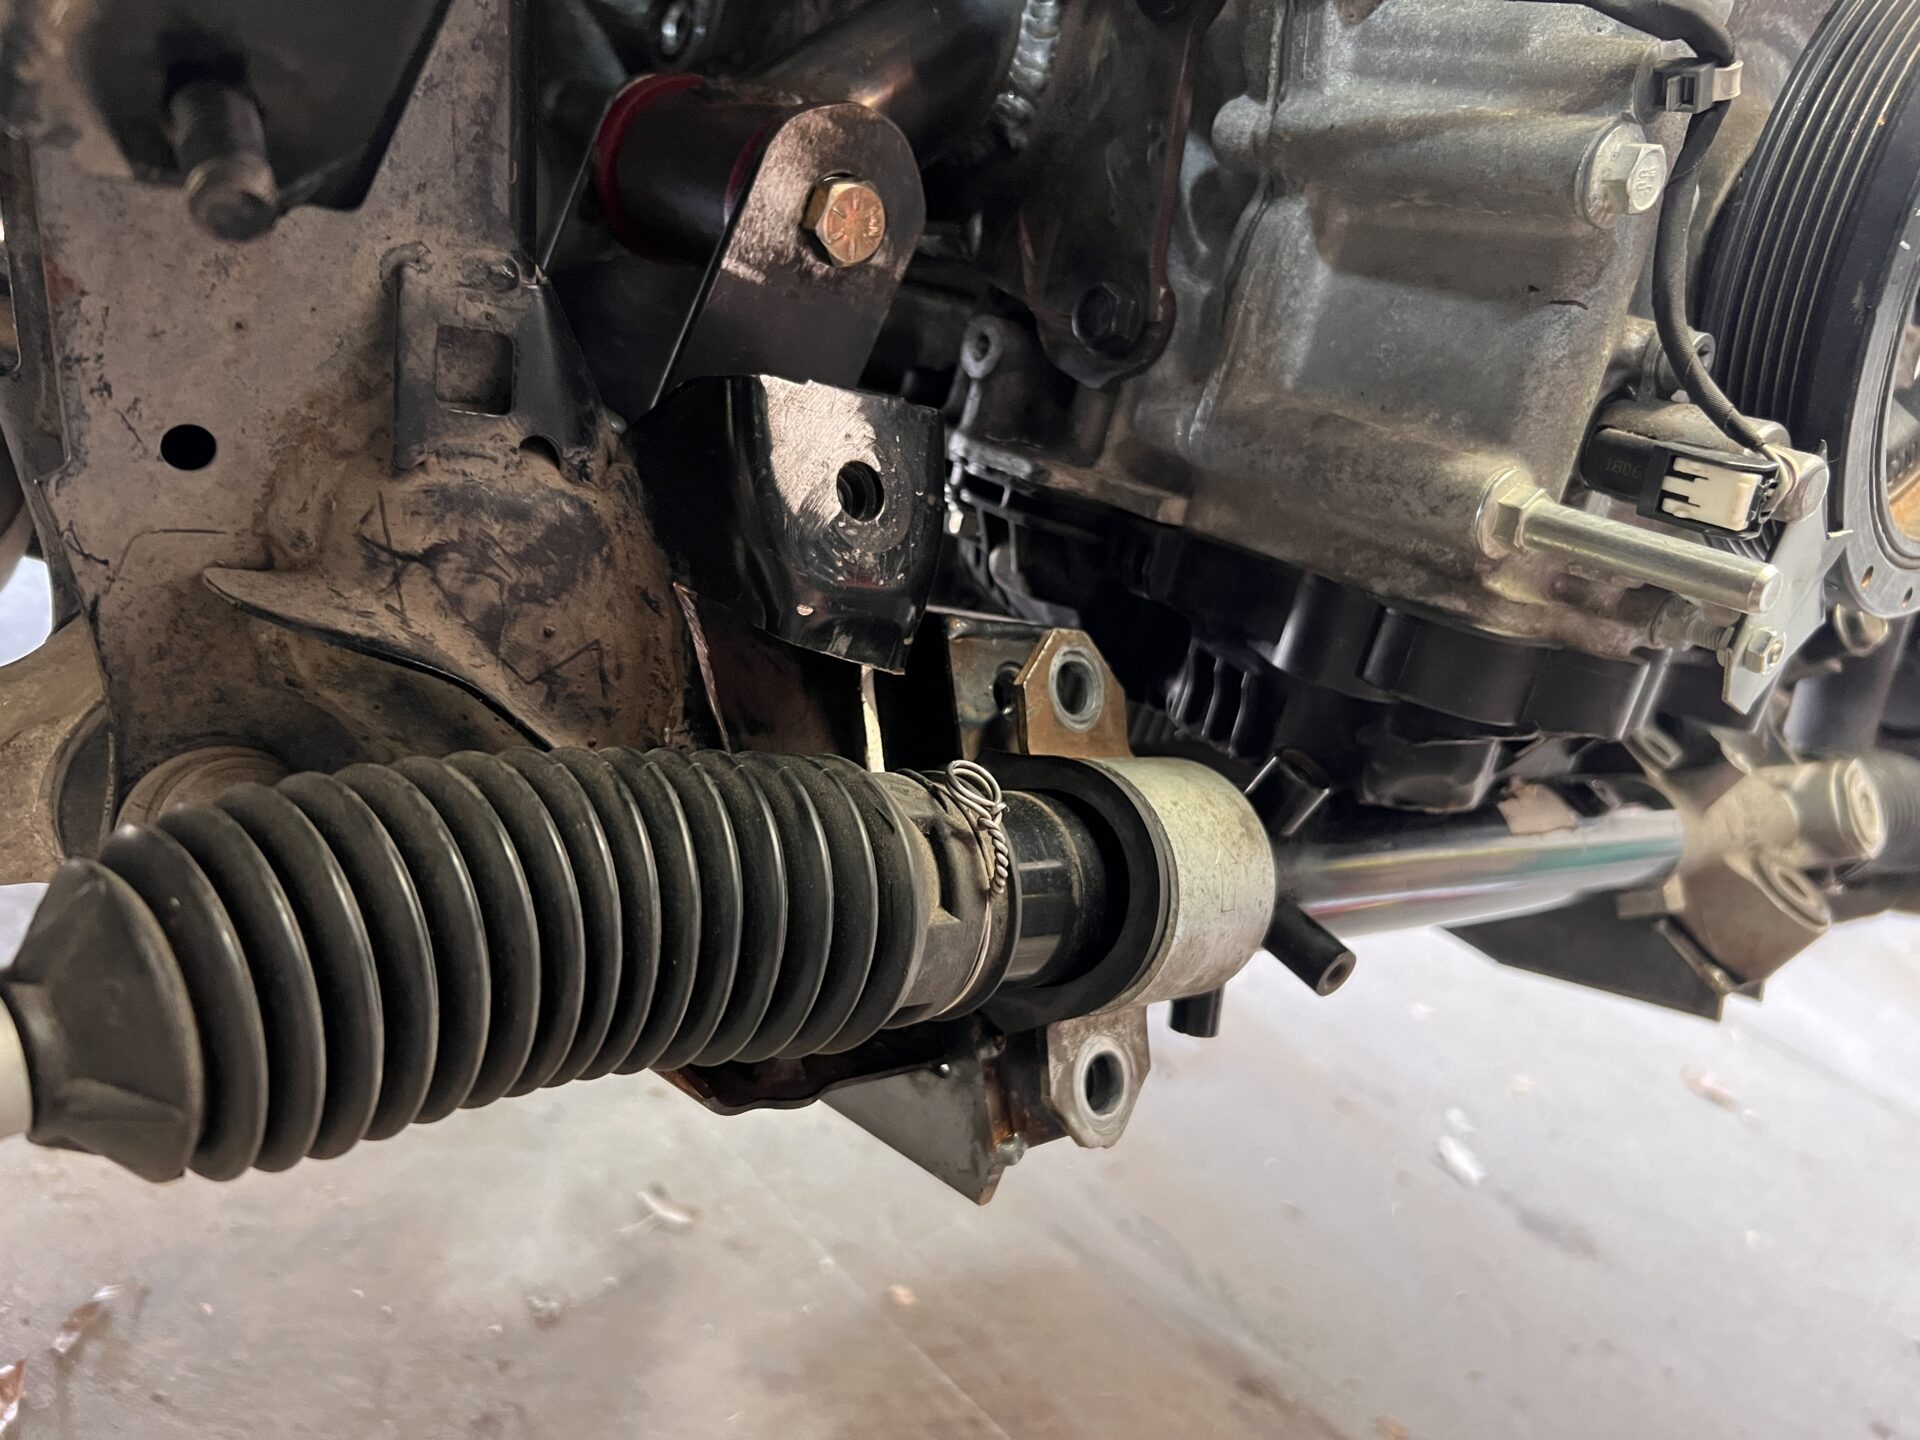
I considered another rack location where it's at stock height but about 1.5" forward:


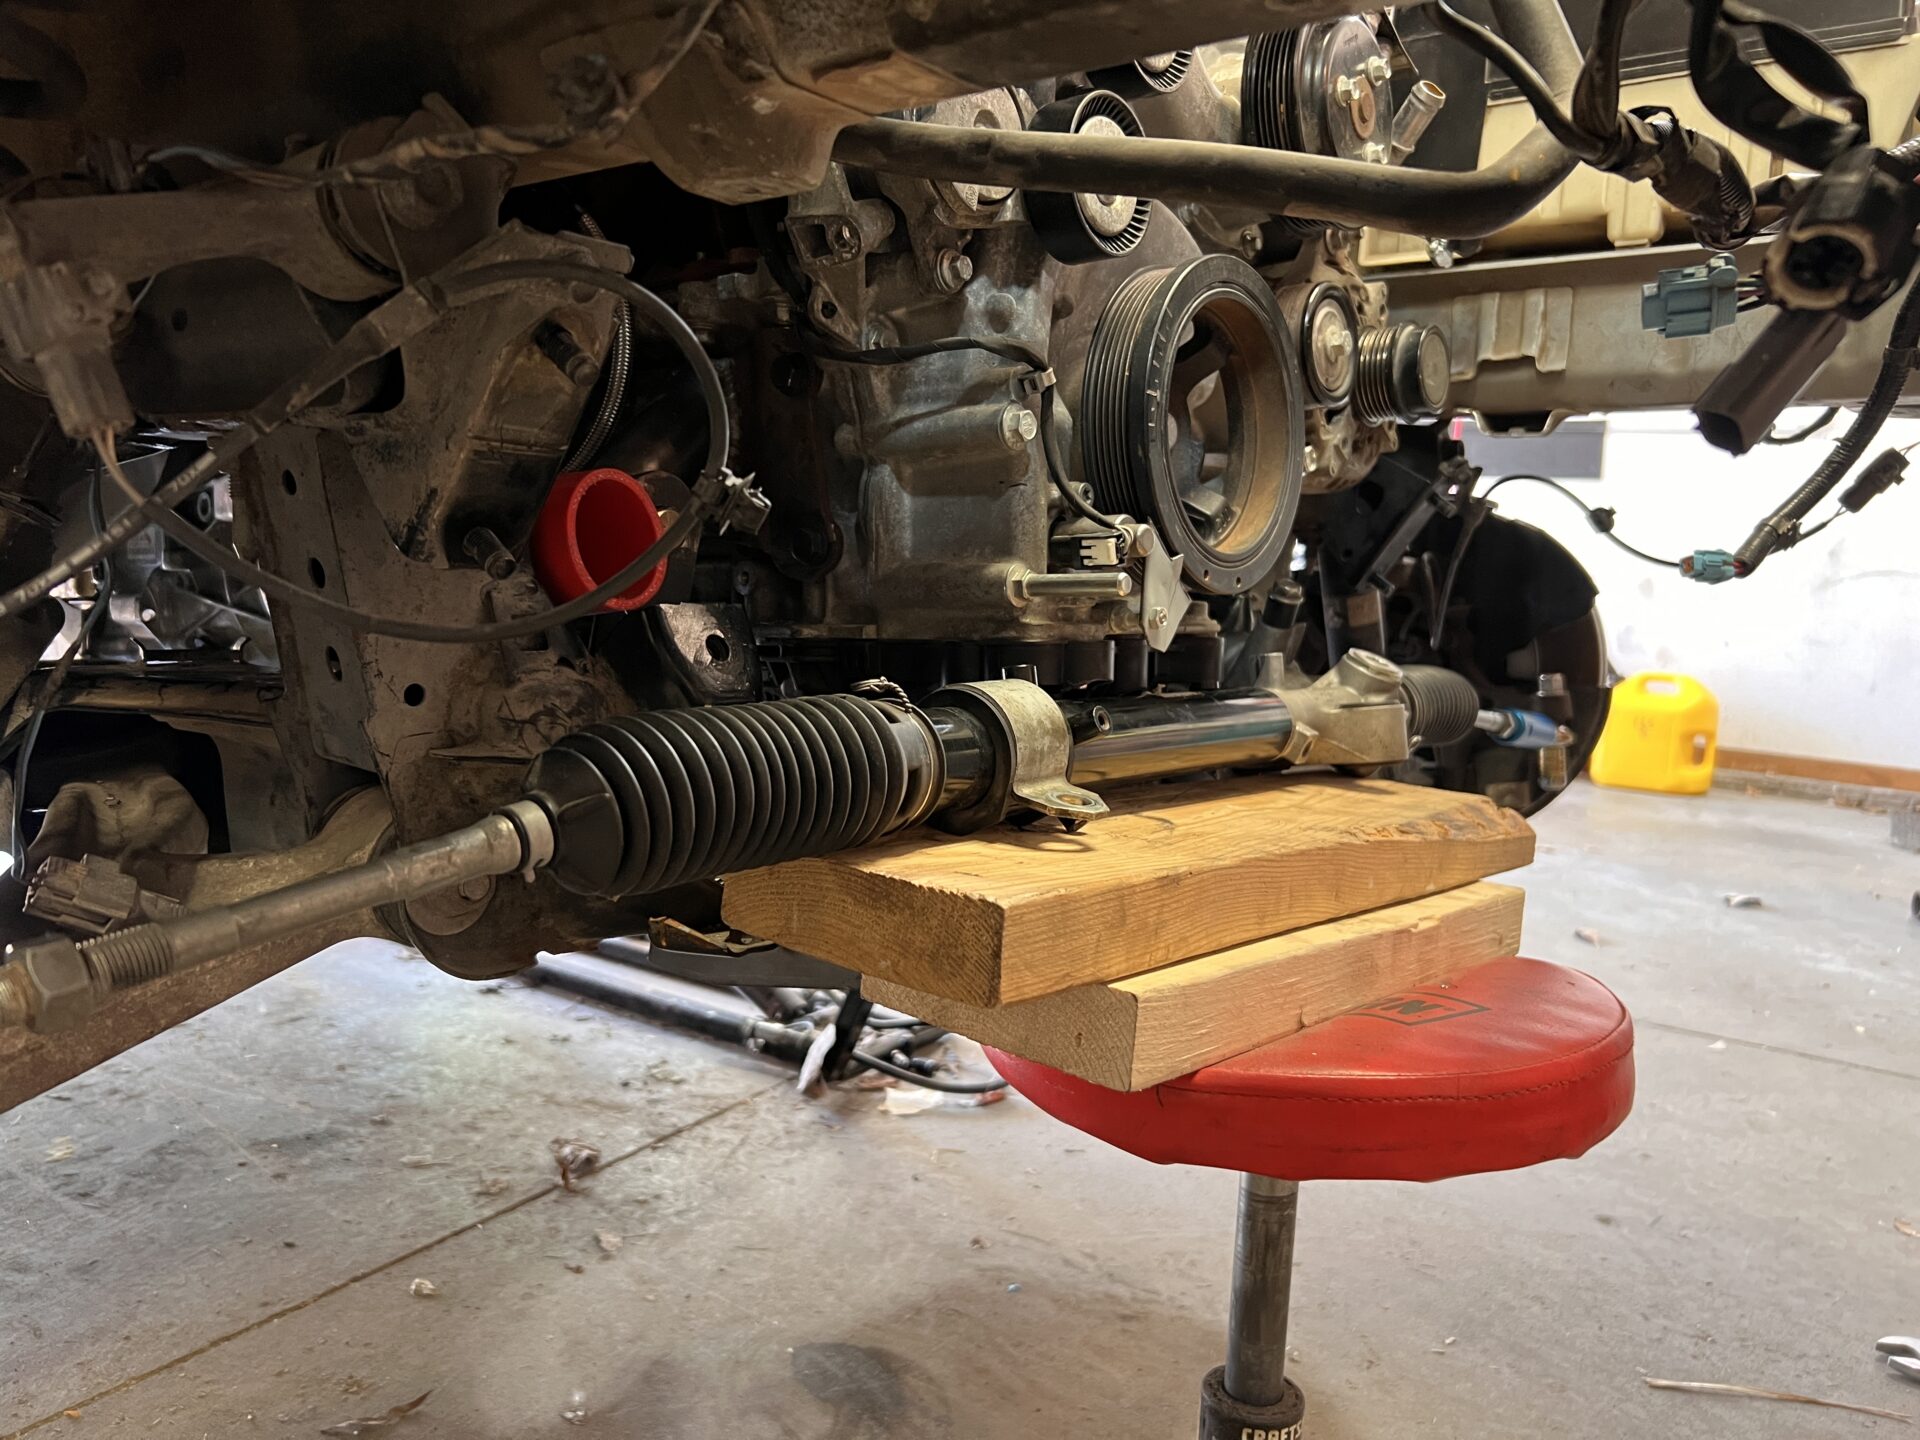
This reduces/eliminates the need for the bump steer kit but could affect Ackerman at high steering angles. I think the right process is to actually mock up both locations and measure steering geometry rather than just guess, but I'm leaning toward the forward location.

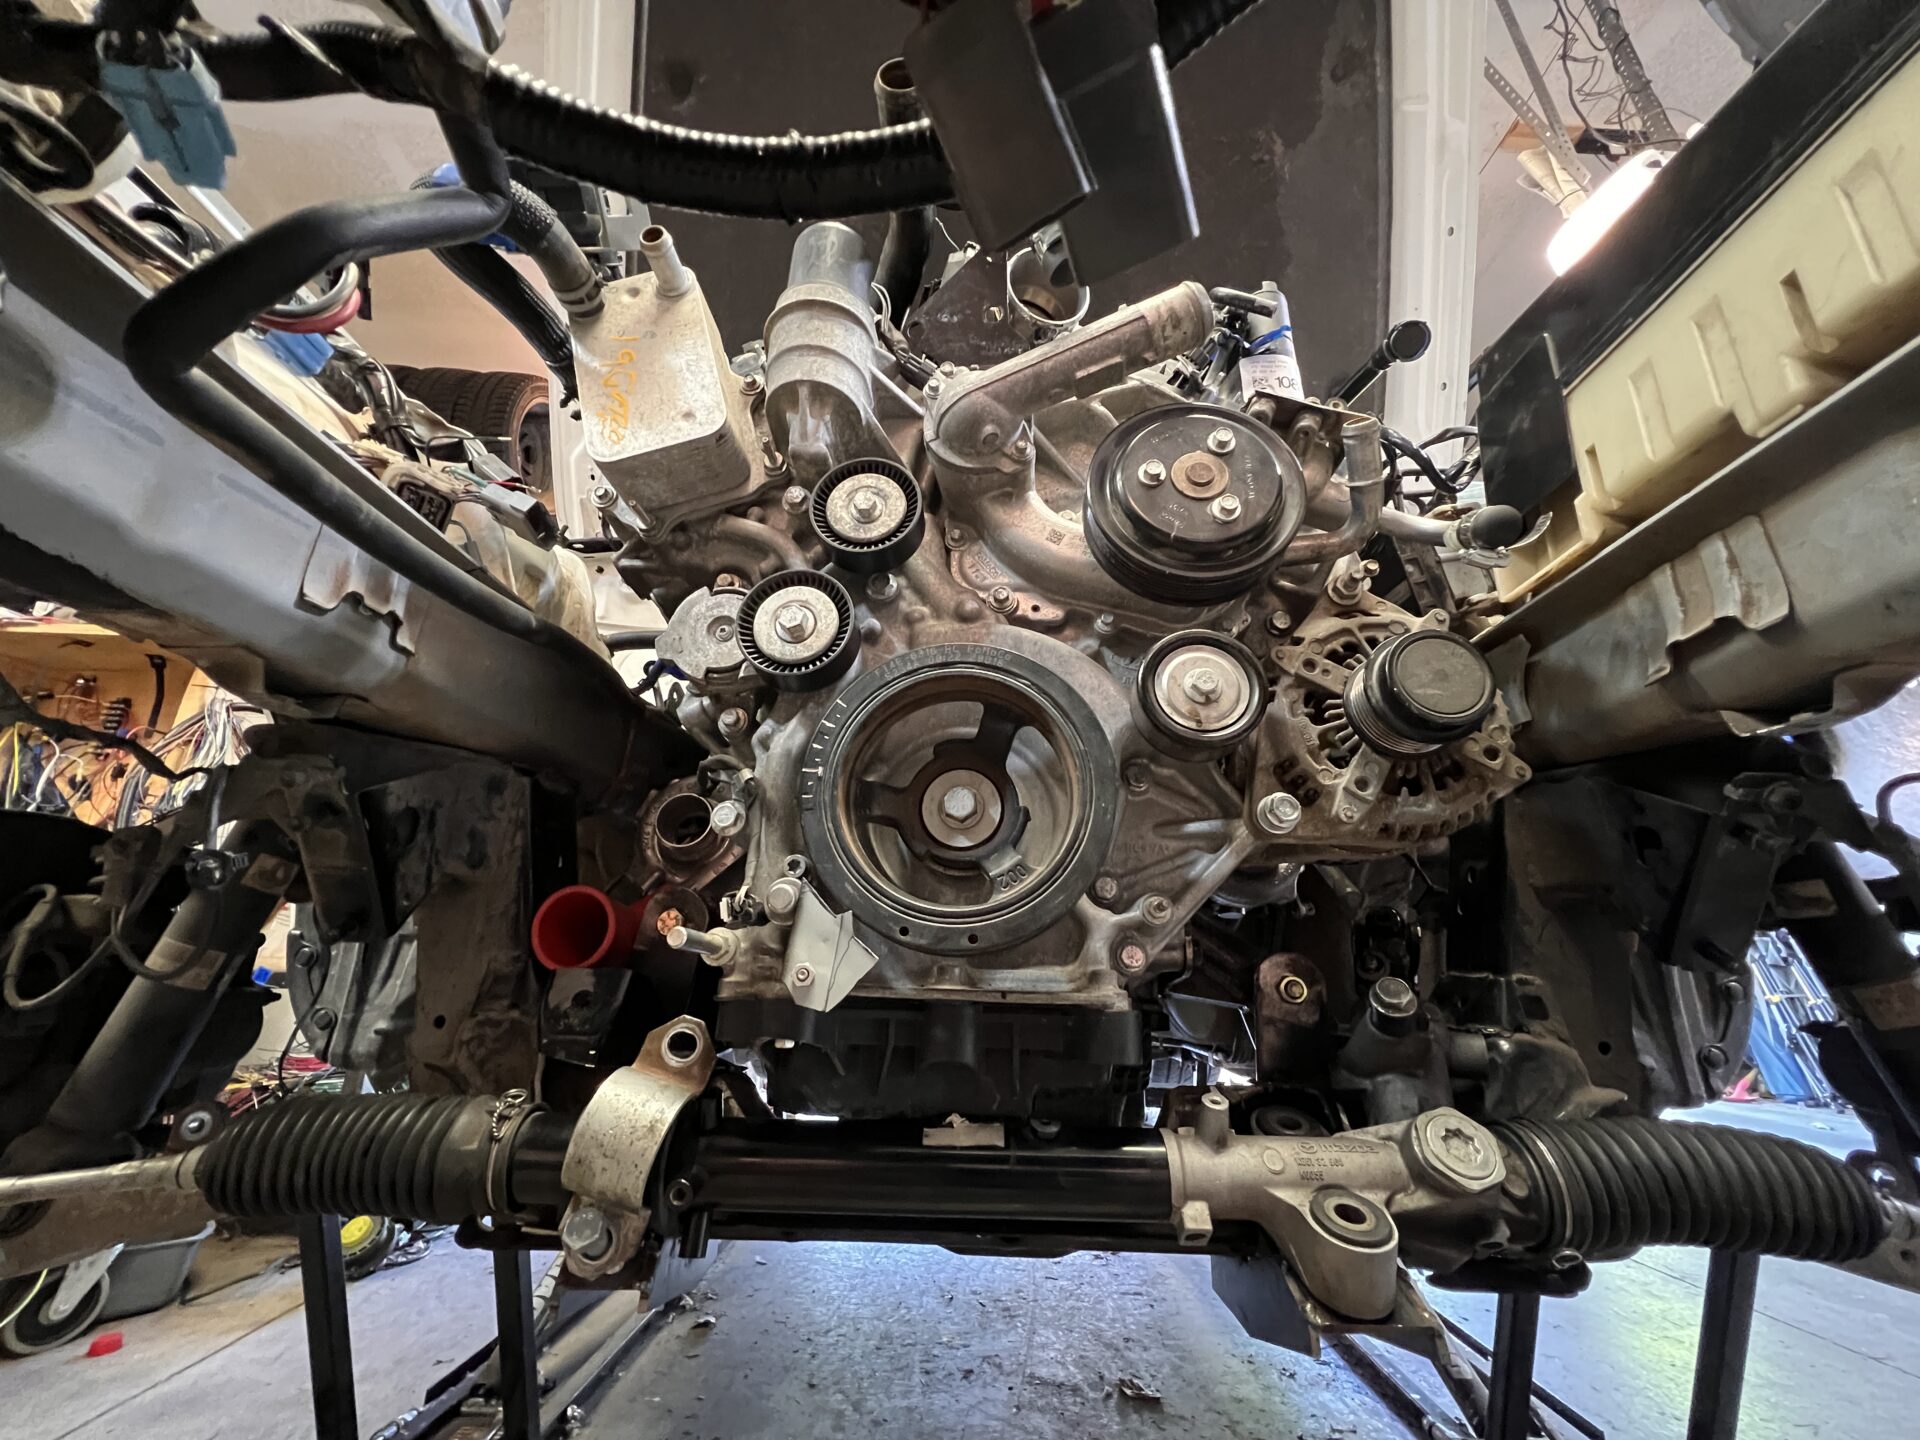
Then I threw my intake pipe onto the TB and surprisingly it fit very nicely:


The plan is to attach a y to that pipe and pull in from intercoolers on each side.

I think my next steps will be to finalize engine bay components in order of importance:
- Steering rack
- Radiator/fan
- Turbo intake piping and filter location
- Intercooler installation and piping

Then I need to get the ECU in the car and wired up, along with relocating the battery to the trunk.

Then it's fuel system mods, getting the new pump into the tank and connecting up the existing fuel line to the new engine along with the flex sensor.

After that it's just easy stuff like finalizing the diff location, fabbing mounts for that, getting the axles installed, building out a complete exhaust, etc. Should be no time at all  :yay:

Offline Laminar

Re: Laminar's RX-8 EcoBoost swap thread
« Reply #186 on: May 30, 2024, 07:49:39 AM »
As I discovered that I really need to finalize the steering rack location before I can get the rest of the front end in place, I went about making a bump steer test rig. First step was 3D printing a piece to serve as both a drill pattern and a way to hold the level box.


I yanked the strut out and figured out the range I'd need to cover to get full bump to reasonable droop.


Then I grabbed a melamine shelf and cut everything to size. I finished it off with some self-adhesive rulers. I have a digital indicator and roller that I need to attach to the hinged panel and then I'll be ready to see how bad things are.


In the meantime I also wanted to delete the HID kits the PO had installed as they were extremely underwhelming at night and also took up engine bay space. When I went to pull the bulbs out of the housings, it was...bad.


The sockets are hacked up and the bulbs were hot glued in place. The HID bulb electrode was definitely touching the projector housing and melted it a bunch. Super not cool. I got a pair of H7 LED bulbs and then went about figuring out what missing pieces I needed to get back to the stock setup. I decided to run to the junkyard to find some similar Mazda projector headlights that I could swipe the clips from. As I'm poking through the "Import" section, I saw this bad boy...


Well this makes the hood question a lot easier! I also nabbed the rear truck access panel for a potential future stereo modification.


Now I can hack it up without having to worry about ruining a good one. Maybe I'll be able to attach something that gives me the clearance I need, or maybe I'll use it to make a mold for some kind of composite hood. I have options!

Back to the bulbs - I grabbed the clips, retainers, and pigtails off of a 2010 Mazda3 in hopes that they were the same. The bulb retainers matched and the retaining clips were close, but not the same.


I got the bulb in place and aimed it at the garage door to see what output looked like. There was definitely some bleeding above the cutoff line, not ideal. Not sure if it's the nature of the housing and bulb or it has something to do with the melty reflector.


While I had the headlights out I went ahead and ran through the Cerakote headlight kit to get rid of the cloudiness and yellowing.


I need to finish off the bump steer tool and get to making measurements.
« Last Edit: May 30, 2024, 10:01:31 AM by Laminar »

Offline digitalsolo

Re: Laminar's RX-8 EcoBoost swap thread
« Reply #187 on: May 30, 2024, 09:57:06 AM »
Score on the hood!

Also:  "melted it a bunch. Super not cool"

Definitely not "cool".  :D
Blake MF'ing McBride
1988 Mazda RX7 - Turbo LS1/T56/ProEFI/8.8/Not Slow...   sold.
1965 Mustang Coupe - TT Coyote, TR6060, modern brakes/suspension...
2007 Aston Martin V8 Vantage - Gen V LT4/TR6060, upper/lower pullies, headers, tune.
2021 Tesla Model 3 Performance - Stock...ish.

Offline Laminar

Re: Laminar's RX-8 EcoBoost swap thread
« Reply #188 on: June 03, 2024, 08:18:18 AM »
I took a look at hood clearance. Not top priority but I was interested to know about where I'd need to cut. I marked the high spots:


And then mapped out roughly where they land on the hood.


One idea I had had was cutting out the triangular indent and inverting it so that there's a triangular bump out. That looks like it could almost work, but would probably require some fiddling with that coolant line. Another possibility is adding a radiator hood extractor in that area in a way that gives me more underhood clearance but lets the hot air out. TBD on that.

Finished dinking around with the headlights, got the H7 bulbs installed and HID kits thrown away. Took an H7 retainer and clip from a Mazda3 in the junkyard. The retainer fit but the clip did not. With some creative bending I got everything to work.


I finished my bump steer gauge and took some initial measurements.


Results are...bad. You can see that at ride height where the LCA is about level, the steering arm angles upwards even with all of the bump steer spacers installed.


Total toe change from 2" bump to 3" of droop is 0.5"...yikes. I'm going to raise the rack and try it again.

Offline Laminar

Re: Laminar's RX-8 EcoBoost swap thread
« Reply #189 on: June 04, 2024, 08:43:24 AM »
OKAY. Feeling better!

I moved the rack to the other possible position, higher up but further forward. I left all of the spacers in place and ran the numbers again. This time the line sloped in the opposite direction, indicating that the outer tie rods ends were actually too low, which I can work with! I took out a few of spacers and ran it again and...it was perfect. Well, close.


The gray line is where I started - about 3/4" of toe change over 5" of suspension travel. The blue line is the raised rack position with full spacers. Slope direction indicates the outer is too low, and I had about 3/8" total toe travel. Orange is where I ended - max 0.006" toe out during bump and 0.017" toe in during droop.

Longacre says 0.005-0.015 bump out is okay but shoot for no bump in. As you turn, the outside corner compresses and the inside corner droops. If the inside corner experiences some toe out in droop, it adds to the Ackerman effect and can aid cornering. This test was enough proof that I can remake my brackets to set the rack in this higher position. Then I can play with final spacer stack to see if I can nail the bump steer. Speaking of Ackerman, that would be the final thing to check as moving the rack forward can mess with that. Worst case scenario I can make some spacers to attach to the rack ends to shift the tie rod inners rearward to regain any necessary Ackerman.

Offline digitalsolo

Re: Laminar's RX-8 EcoBoost swap thread
« Reply #190 on: June 04, 2024, 09:21:55 AM »
That's one heck of an improvement.
Blake MF'ing McBride
1988 Mazda RX7 - Turbo LS1/T56/ProEFI/8.8/Not Slow...   sold.
1965 Mustang Coupe - TT Coyote, TR6060, modern brakes/suspension...
2007 Aston Martin V8 Vantage - Gen V LT4/TR6060, upper/lower pullies, headers, tune.
2021 Tesla Model 3 Performance - Stock...ish.

Offline kinger

Re: Laminar's RX-8 EcoBoost swap thread
« Reply #191 on: June 04, 2024, 09:48:20 AM »
Impressive, keep working it and take your time here, this will make or break the car driving experience, nothing worse then high speed jittery behavior.  Should be a ripper!  Did I miss the weight savings/gains from using a LS v8 in there?  I assume the EB is a little lighter?
93 Touring, 6.3L, T56 Magnum, Mamo RPS BC2 clutch, FAST 90, NW 90TB TB, 8.8, samberg everything, AC, PS, TC, Cruise, LED Tails, HID head lights

Offline Laminar

Re: Laminar's RX-8 EcoBoost swap thread
« Reply #192 on: June 05, 2024, 05:46:52 AM »
Vorshlag weighed a complete ready to run LS1/T56 with all wiring and accessories (the only way you should weigh an engine) at 608lbs. When I pull my assembly out I’ll have to weigh it now that I have the AC and clutch/flywheel installed. If I was betting I would put it at 575lbs.

I’d never recommend someone go this route over an LS. If you want 300-400hp a turbo 4cyl is a much better way to go. If you want a quick and easy swap LS is a no brainer.

I just like suffering, apparently.

Offline digitalsolo

Re: Laminar's RX-8 EcoBoost swap thread
« Reply #193 on: June 05, 2024, 10:19:45 AM »
I just like suffering, apparently.

I mean, we all do.  That's why we didn't buy Corvettes.  Haha
Blake MF'ing McBride
1988 Mazda RX7 - Turbo LS1/T56/ProEFI/8.8/Not Slow...   sold.
1965 Mustang Coupe - TT Coyote, TR6060, modern brakes/suspension...
2007 Aston Martin V8 Vantage - Gen V LT4/TR6060, upper/lower pullies, headers, tune.
2021 Tesla Model 3 Performance - Stock...ish.

Offline Laminar

Re: Laminar's RX-8 EcoBoost swap thread
« Reply #194 on: June 05, 2024, 04:39:27 PM »
Here's where the rack ended up (but before I reduced the spacer count):


You can kind of see how I notched one of the plastic bosses on the oil pan to get it a little snugger:


This angle shows that it's moved pretty far forward, which is why I want to check Ackerman before I declare victory: