This is a quick guide to replacing your FC cluster with aftermarket gauges.
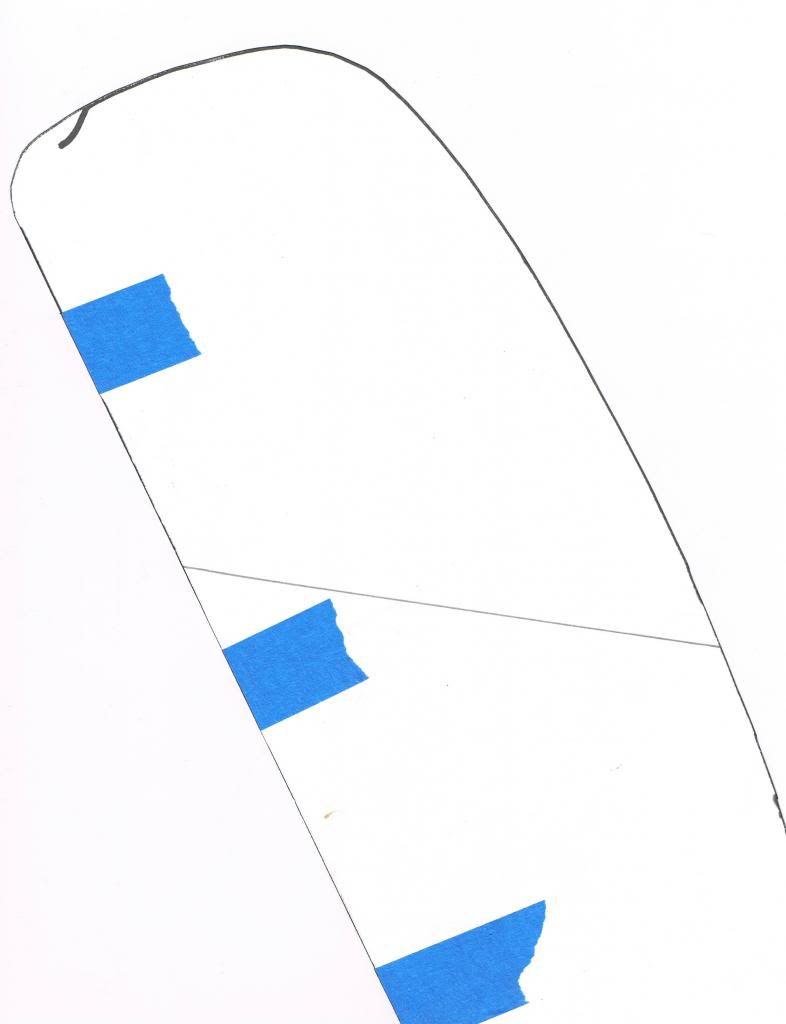
I have attached the template here you can use to replace your FC cluster with another set of gauges. The template is larger than one sheet of paper, so you need both images to make a complete template.

Directions for the template -
1. Save both images to your computer. If you try to directly print the template, it will be too small.
2. Print both images as full page photos, if there is an option to "fit picture to frame", uncheck it.
3. Cutout both sides of the template - Cut along the outer edge of the black outline. If you cut the black outline off your template may be slightly small.
4. Match the diagonal lines up and you should have your template.
How to use template -
1. Remove your gauge cluster
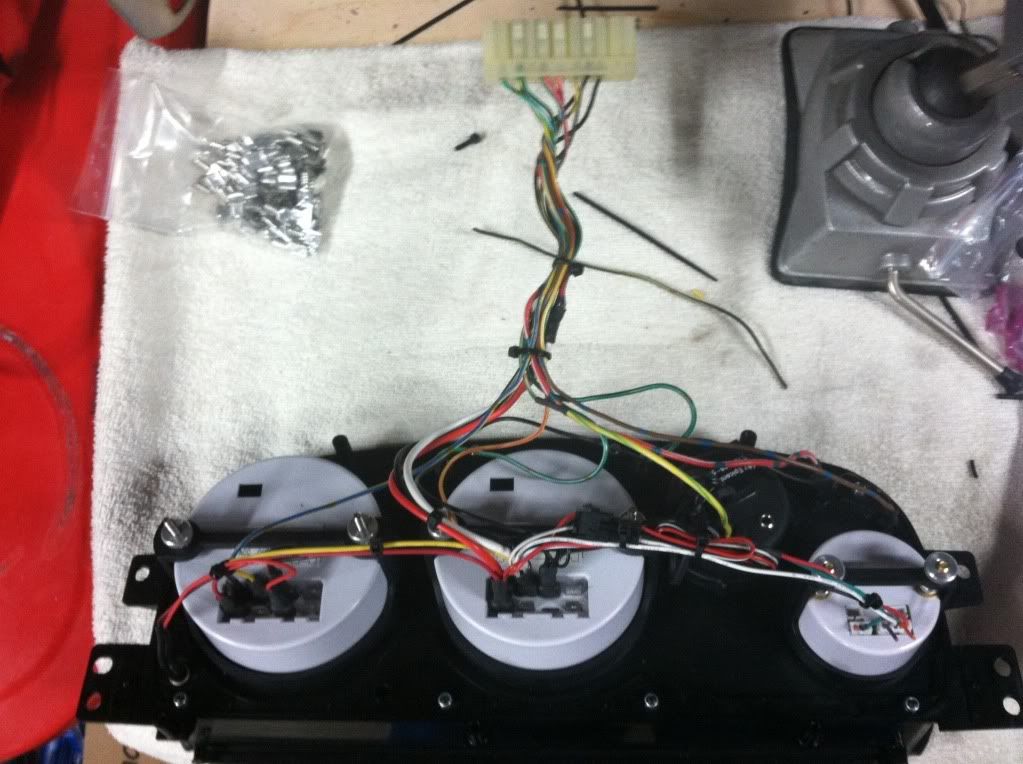
2. Separate the actual cluster from the lens, there are a few phillips screws around the perimeter of the rear of the gauge cluster. Removing these screws will leave you with 2 pieces.
This:

And This:

Set the gauges aside, we will be using the lens.
3. Remove the lens from the gauge trim panel. We want to use the black gauge trim panel in its entirety, so take care not to damage it. For me personally, I did not care about the lens and did not desire to reuse it, but you could use the lens if you wanted to after you assemble your gauge cluster. To remove the lens I simply used a dremel with a cut off wheel and cut the lens where it is glued to the gauge trim. I cut through the lens but not the trim panel.
4. You should now have a trim panel and be able to test fit your template in the trim panel. If all looks good with your template, transfer your template to your material of choice, cut it out and do final sanding of your piece for a perfect fit.
5. Cover the front of your new gauge panel with masking tape. I used a compass to create circles out of poster board that were size of my gauges for mock up. When I got the gauges where I wanted them I traced them directly on my new gauge panel. You will also want to use some small screws to mount the new gauge panel to the trim panel. Take this time to figure out where those best fit. I used 3mm button head hardware, 4 screws across the bottom and 4 along the top. Remember that your gauges will have mounting cups/hardware, so take that into consideration and give everything proper spacing before you begin drilling.
6. Drill out all your marked holes. When you test fit your new gauge panel again, you will see where you need to cut and remove material from the original trim panel. Cut as needed.
7. Now use your small hardware and mount your gauge panel to the trim panel for strength and install your gauges, idiot lights, etc.
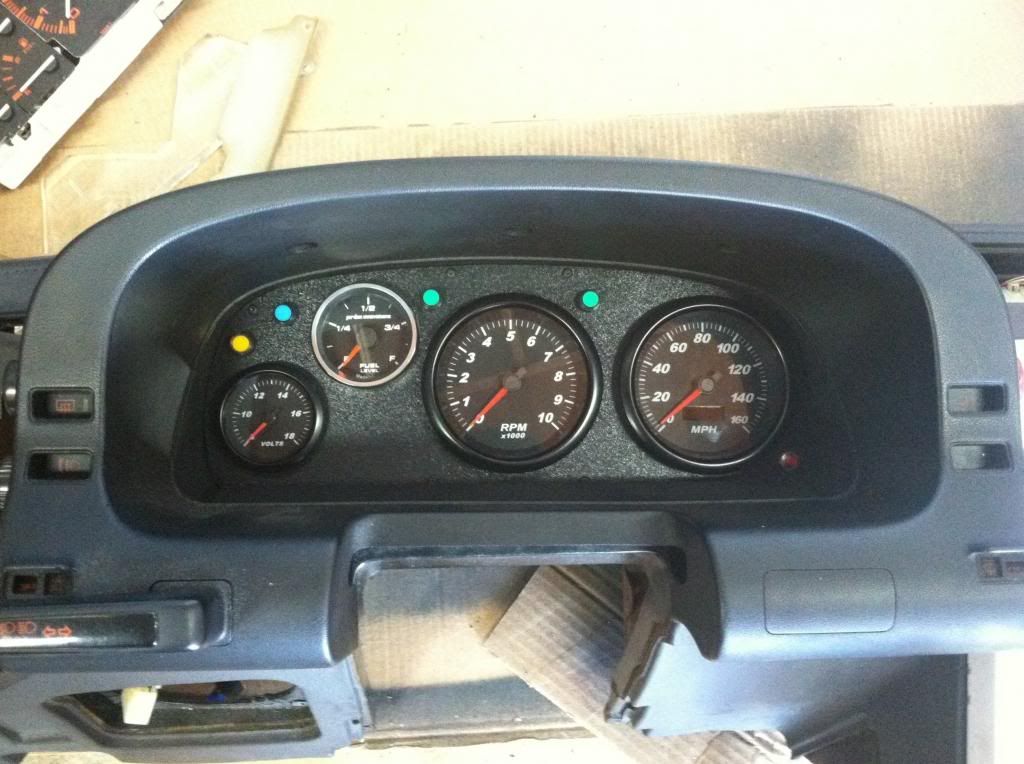
Here are a couple pictures of the finished product:
Here you can see the chrome locknuts I used to mount the panel
Finished product from the front: