I had this build on the other forum and I though people on here might want to check it out, so I figured it would be a good time to make a thread detailing the build. It started off by purchasing a right hand drive 1994 Efini RX7 R2 model parts car with only 50k miles on it that I found on ebay of all places. After a quick trip to Philadelphia, I had my starting point for the project. This is what it looked like when I first picked it up. The black interior was in dire need of a good cleaning and some 303 protectant for the dash and other vinyl parts.


The body was in decent shape, but the front bumper had a large scuff from someone running into something, the front plate holder riveted to the bumper had to go,and there were several dents on the car. The paint was also aged and therefore in need of some bodywork and a new paintjob done by myself. I decided to update the color by switching to Subaru Aspen White from a 2005 STi, the car I had right before this one. Here are some pictures of how the car turned out after the paint:


The next thing on my list to do was lowering the car on the factory Ohlins suspension, and giving the wheels a much needed makeover. I also finished up my DIY ?99 spec taillights while I had the car apart. Don't mind the tag on the car, it was on my last LS6 FD so I temporarily had it transferred to the R2. It's no longer on the car.


As much as I hate running a front plate on the car, I did not want to take any chances getting pulled over on the drive up, so I made a quick bracket to mount it out of the way as much as possible without drilling any holes into my newly repainted bumper. I actually attached the bracket to the front tow hook. After driving it around for maybe 600 miles or so, it developed a bit of a hot-start issue common to rotaries that the compression is getting low on. About a week before I was supposed to drive the car home, it began to burn coolant and smoke, so it returned on our trailer. I began pulling apart the motor to find the following:

This pudding-like mixture of oil and coolant was literally in every cavity in the motor. It was in the oil pan, in all of the coolant passages, and it was even in every bit of the charge piping, intercooler, inside the engine, and also managed to puke itself backwards through the intake on the air filter as shown above. Oh well, I had big plans for the car anyway, so it was no big deal to me. I parted out the longblock and transmission and began to buy parts and materials for the real build. I already built an LSx RX7 the year before, so I decided I wanted to do something just a little different. I did some research and decided to use the infamous 2JZGTE engine found in the Toyota Supra turbo. I choose the motor for several reasons; It can make good power on the factory shortblock, it sounds amazing, and it is less common than the LSx swaps in the FD. Since I would be replacing many of the factory parts, I decided to save myself some money and picked up an Aristo 2JZGTE. It is the same engine as the Supra, but with a front sump oil pan, smaller cams, ceramic bladed turbos, and a couple other small differences. I considered using the Getrag 6-speed in the car, but realized I wanted a drag car that could see some street duty, not the other way around, so I chose a built TH400 transmission from ATF with a reverse manual valve body built to handle 900+ hp. I made sure to get an SFI approved JW Superbell bellhousing for safety reasons, and it was CNC machined to gain some extra clearance around the engine and transmission tunnel.

In order to mate the GM transmission to the Toyota engine, I used an aluminum adaptor plate and an SFI approved billet aluminum flex plate that bolts to the 2JZ engine and has a GM torque converter bolt pattern.

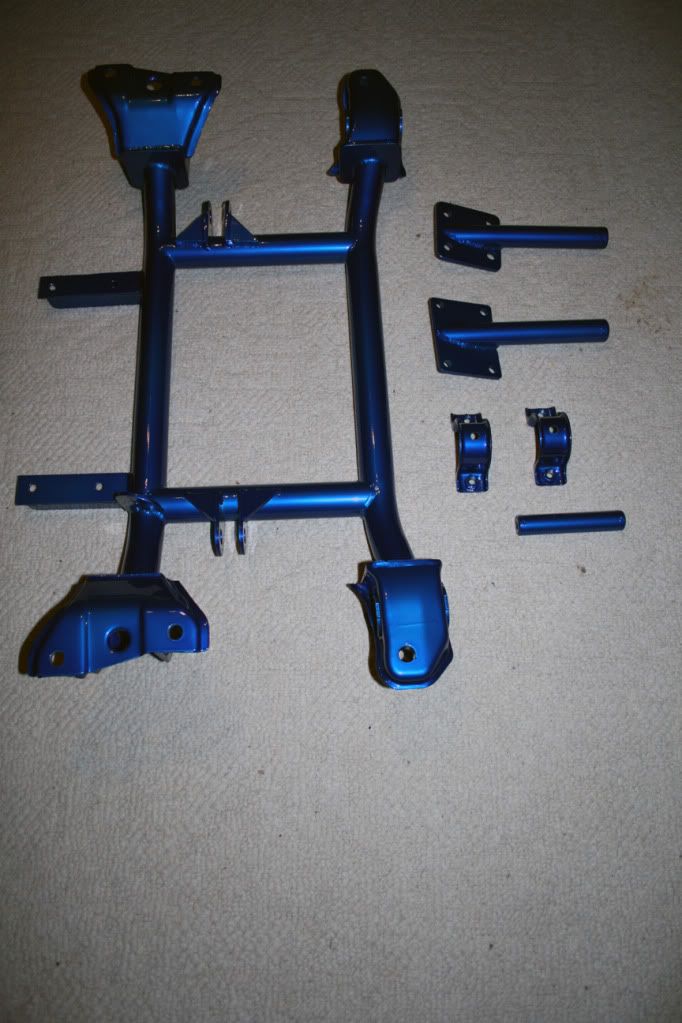
From there, I ordered some chromoly and got to building my custom subframe and transmission mount. I had several goals when building the engine mounts and subframe that included: using the stock hood on the car without adding any scoops or a cowl, minimizing the bumpsteer induced by lowering the steering rack, keeping the engine as far back and as low as I could to keep the CG and F/R balance in check, and utilizing solid mounts for the engine via ?? rod ends. Here are some pictures from the subrame build:


After finishing up the subframe, I powder coated it with a chrome base and then a candy blue top coat. It came out really nice and sits the engine exactly where I wanted it.


The next step for me was the exhaust manifold fabrication. Sure, I could have just purchased a Supra manifold and called it a day, but I like doing things on my own and being able to say I built 90% of the parts on the car. I also wanted to use one of the new Tial V-band turbing housings, so a custom manifold was in order. I ordered some 321 stainless steel from Burns Stainless for its resistance to cracking at extreme temperatures, low thermal expansion, and excellent corrosion resistance. The head flange was CNC machined from 304 stainless steel also. Of course, I needed a turbo before I could make the manifold, so I picked out a Precision GT4276 turbocharger and ordered a Tial V-band turbine housing. This is what I received several weeks later:


Here is a ping-pong ball for a size comparison, lol.

After I had the turbo, I got to work on the manifold. I?m using 1.75? primaries, two 3-1 double-slip merge collectors, and then two 2.25? secondaries that merge just before the v-band flange.


While I was working on the car, I also cleaned up the bay by removing the ABS and I am working on pulling a lot of unnecessary wiring from the body harness to make the engine bay as open and clean as possible.


The manifold is mocked up and mostly tack welded in place for the time being. It took about 23 hours of work to get it to the current state. The header is finished and the wastegate has also been put on. The intake manifold was designed using Unigraphics NX6 and CFDesign 10.0 in order to create an even distribution of airflow into each cylinder. The manifold has the head flange, runners, and plenum base plate welded, ground, and smoothed into each other also. The custom CNC throttle body flange are cut and I just need to weld them onto the plenum. I will put up some of the CFD screenshots I took for the analysis I performed intake manifold as soon as I have access to my laptop again.
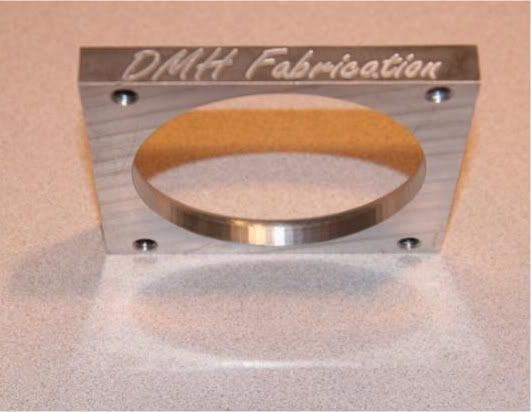


I finished welding the intake manifold and added a fitting on the bottom to route to a vacuum block. I also set the Wilson 90mm throttle body in place to get ready for mocking up intercooler pipes. The intercooler core has been fitted flush against the front of the frame rails, and one bar across the front of the rails had to be removed due to the intercooler's size. I have also made patterns for the backdoor end tanks and will be fabricating them tomorrow most likely. The radiator arrived and will have mounts built for it once I permanently mount the intercooler and add a new support. The intercooler is about 4 inches wider than it looks in the pictures since I covered up some of each end with the end tank templates. It's quite massive, lol.
On to the pictures!


I finished fabbing the intercooler end tanks, welded the v-band flanges to the back-door end tanks, welded the end tanks to the intercooler core, removed a bar in the way of the intercooler's location ( a chromoly support will be replacing this behind the intercooler), and made mounts for the intercooler and also welded those on. The front bumper cover has been trimmed to accommodate the massive intercooler. I also went ahead and welded a v-band flange onto the Wilson 90mm throttle body that will allow me to eliminate a coupler location to ensure no couplers blow off on the car under high boost. The afco radiator placement has also been finalized, but I did not have time to make mounts for it yet. I also removed the factory brake master cylinder and am replacing it with a Strange manual brake master that is shown mocked up in its location in the pictures. That part will save me some weight, gain extra clearance for the downpipe, clean up the engine bay even more, and get rid of one more vacuum line on the car. I have also removed the factory gas tank and have already modeled a 10 gallon aluminum tank to take its place in the car. I did some more wiring removal and clean up as well to get rid of 4 unnecessary relays and a bunch of associated wiring. Intercooler tubing and downpipe construction is next on the list.
Onto the pictures:


Notched part of my frame rail for clearance and fabbed up both of my intercooler pipes:


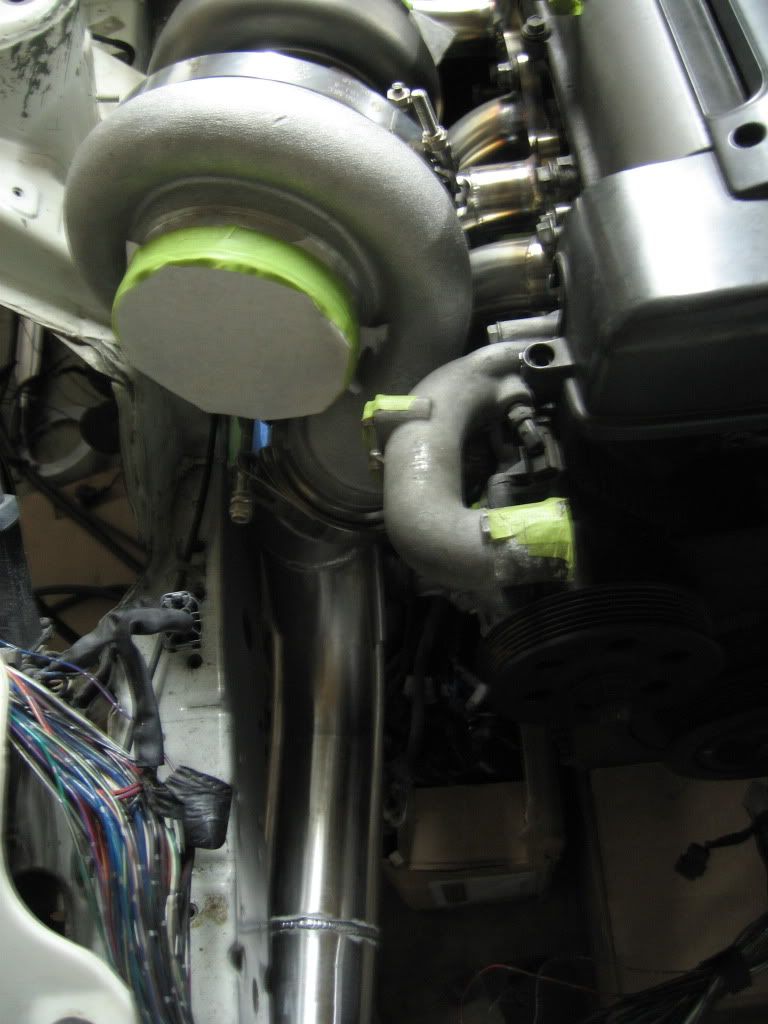

Now that's what I call short route intercooler tubing

The v-band flanges I machined myself and added an o-ring groove in order to provide a nice seal. I have viton o-rings i will be using for this. I also have tacked in one of the two pieces of 4130 tube that will reinforce the radiator support and provide a mounting location for the radiator to attach to.
Some more progress. I welded in my chromoly cross bar and radiator cross member support. I also fabricated my radiator mounts off of the new cross bar. My fuel cell will be built this week since I have now finalized my dimensions, and I will finish up my delrin bushings for the front suspension I'm making.


So, 6 hours of wiring later I have removed a ton of unnecessary wiring, relays, connectors, and relay boxes. The new front half of the body harness is probably 1/4 to 1/3 as large as the original. On the passenger side of my car there were originally about 30-40 wires that passed through the firewall. Now, there are 5, lol. I have a picture of the box of wiring/relays etc. that I pulled out of the car below. It's actually a lot more than it looks like since I wound up the removed wiring and packed it into the box. The body harness of the car is now pretty much finished. I relocated one necessary relay inside the firewall, and have to find a place to tuck away 2 small relays, then I can re-wrap the harness and tuck it away.


Over the past couple of days I built my own lube groove delrin front suspension bushings and 4130 steel bushing inserts also.


I fabricated my downpipe and wastegate dump tube. I also welded 90% of my fuel tank and installed my brake master cylinder adapter plate.


Removed my engine, trans, intercooler, radiator, etc and did a little engine bay prep. I welded shut about 50 holes that were no longer being used and sprayed some primer until I can get some high build stuff and then paint the bay soon. I also made some block-off plates for the factory a/c firewall pass-through and the factory engine harness grommet with provisions for some deutsch connectors that will be used for the engine harness.


Finally, I have some more progress (albeit minor) to post up. I painted the engine bay and touched up the wheel wells. I should be able to put my front suspension back on now.


